Something you may not know about me is Martha Stewart and I share an alma mater. Also, we both heart Westchester County, expensive food, and french bulldogs. CLEARLY WE’RE MEANT TO BE. On that note, in the coming weeks I’ll bring you some Martha-worthy, Autumn-tested edible gifts that won’t end up re-gifted (or used as paper weights). First up, Pomegranate Vanilla Bean Marshmallows.

Ever since my hand mixer and I survived our first batch of homemade marshmallows together, they’ve been one of my favorite treats to impress people with. And eat. Which is perfect since my top priorities are eating and impressing people. Marshmallows are mind boggling, the sort of processed food that we assume a Kraft robot gives birth to fully formed.  This will work to your advantage. People will fear you, thinking you’ve sold your soul to corporate food when really all you’ve done is 12 minutes of whipping.

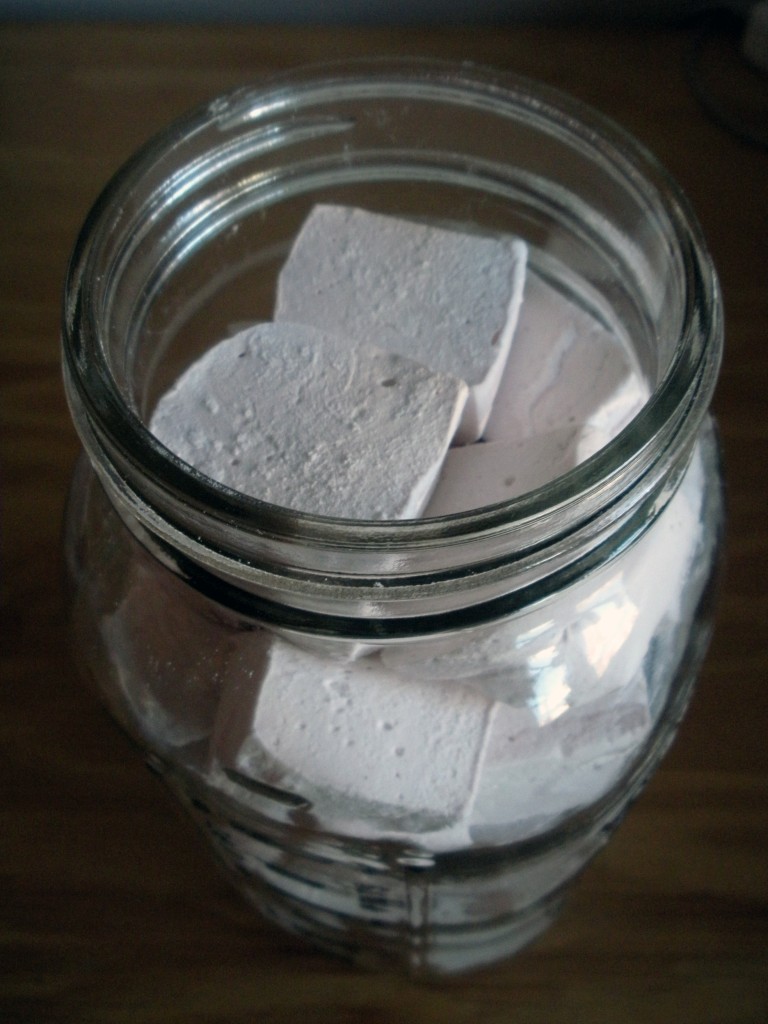
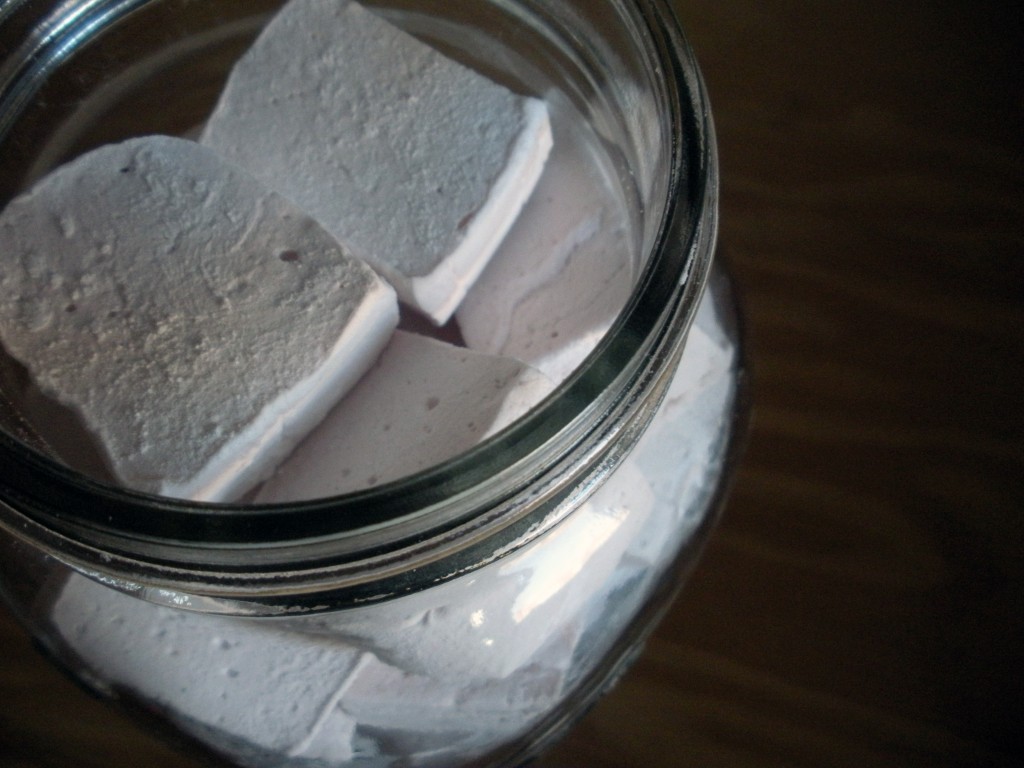
Speaking of corporate food, the kind folks at POM (hearts!) sent me some pomegranate juice to cook with, which was the inspiration for these marshmallows. I replaced all the water in my original recipe with pomegranate juice. I was a bit nervous that the finished product wouldn’t taste pomegranate-y enough, but the results were perfect: just pomegranate-y enough. They’re a lovely shade of light pink and aren’t as perishable as most baked treats, so they ship well. And in the grand tradition of pomegranate 7-up, they’re perfect for the holidays.

Pomegranate Vanilla Bean Marshmallows

A 9×9 inch square pan lined with oiled plastic wrap works best for these, although an 8×8 will work fine too. Adapted from here and here.

1/2 cup cold pomegranate juice
3 packets Knox unflavored gelatin (.75 oz)

2 cups granulated sugar
2/3 cups light corn syrup
1/4 cup pomegranate juice
1 t vanilla bean paste (or vanilla extract if it’s all you’ve got–make sure both are gluten-free)

confectioner’s sugar and corn starch, as needed

1. In a large bowl (or in the bowl of a stand mixer if you are using one) sprinkle the gelatin over the 1/2 cup pomegranate juice. Let this set while you do step #2 below. A gelatin tip: Try to evenly distribute the gelatin over the surface as much as you can. This will help the gelatin dissolve evenly and prevent you from getting little gelatin clumps in your final product.

2. While the gelatin is dissolving, heat the sugar, corn syrup, and 1/4 cup juice in a saucepan, stirring occasionally. Bring to a boil and let boil for 1 minute. (PS: Careful dears, hot sugar is hot!)

3. Remove the syrup from the heat and carefully pour into the gelatin.

4. If you are using a stand mixer, use the whisk attachment to beat on high for 12 minutes.

5. If you are using a hand mixer, again, be careful of hot splatters. If you have gloves, it would make me feel better if you wore them. I started my hand mixer on low and increased the speed gradually, stood back, and didn’t get much splashing at all. I also used a bowl with high sides.  Beat the mixture on high for 12 minutes. At the very end of the mixing process, stir in the vanilla paste/extract.

6. Pour into the oiled, plastic wrap lined pan.

7. Oil another piece of plastic wrap and press it on top of the marshmallow. You want the wrap touching the surface of the marshmallow. Allow to set for a few hours or up to overnight.

8. Mix equal parts cornstarch and confectioner’s sugar in a small bowl. Start with a little and make more if you need it. I began with 2 T of each and didn’t need a lot more than that.

9. Sprinkle a sheet of wax paper (or Silpat mat, if you’re fancy) with the sugar/cornstarch mixture. Remove the top layer of plastic wrap. Unmold the marshmallow, upside down, onto the wax paper, by lifting up on the plastic wrap that lines the pan.

10. Remove the sheet of plastic wrap that was lining the pan and spread some sugar/cornstarch mixture on top of the marshmallow.

11. Use a knife to cut into your desired marshmallow size and dredge the remaining sides of the marshmallows in the excess sugar/cornstarch mixture that is on the wax paper. Add more if needed.

12. Store in an airtight container until ready to eat or give. I’m planning to gift these in a large Ball jar, like the one I used to make butter in.


{ 5 comments }
Good Food Books

by autumn on November 26, 2010

Now that we’ve all eaten ourselves silly, it’s time to start buying each other things we probably don’t need. I am going to help you do just that because the whole buying-people-stuff-they-don’t-need thing is pretty fun, right?

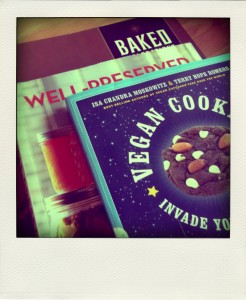
Speaking of buying folks stuff they don’t need, I’m going to make the bold claim that you NEED Baked Explorations. Baked Explorations: Classic American Desserts Reinvented is the second book from Matt & Renato, the butter and sugar slingers behind the BK bakery Baked. I just gave myself the excuse to buy the book after joining a baking group called “Baked Sunday Mornings,” a group of like-minded bloggers baking our way through the book. Look for another Baked treat (made gluten-free) here next Sunday!
Pictured above are the Pumpkin Cheddar Muffins, sans cheddar (only because I sadly didn’t have any) and gluten. Like all the recipes in the book, this one is smart, yet simple. Small refinements not big flourishes are what sets this book apart. Even David Lebovitz loves it!

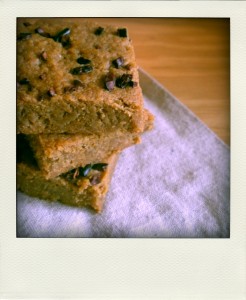
If you’ve even dabbled in baking for folks with dietary restrictions, you know the gluten-free vegan brownie/blondie genre can yield horrifying results. Pictured above are the peanut butter blondies from Vegan Cookies Invade Your Cookie Jar topped with Mast Brothers Cacao Nibs. As a gluten-free baker, I am recommending yet another gluten-y baking book. Here’s the secret: every recipe in the book can be made gluten-free with Isa & Terry’s “Gluten Frida” Mix, which is described at the beginning of the book. You’re skeptical, I can tell. I was too, but these fudgy, toothsome gluten-free vegan blondies proved me wrong.

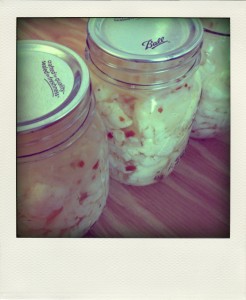
I’ve talked up Well Preserved before and I’m about to do it again. I love the format of Eugenia Bone’s book. Well Preserved has unique recipes for small batch food preservation that are good for beginners without being bland. Bone pairs each canning project with a one or two recipes that utilize the finished product and they’re far from afterthoughts. Although the book isn’t organized by season, Bone chooses produce very intentionally and clearly indicates the best time of year to “put up” specific ingredients. The markets are full of cauliflower right now, so I made spicy pickled cauliflower. So good!

{ 0 comments }

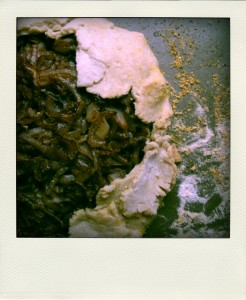
Vegan Balsamic Onion and Sage Cashew Cream Tart

by autumn on November 24, 2010

(Warning and apologies: I wrote something serious, which as you know is not my style.)
I recently read Eating Animals, by Jonathan Safran Foer. It’s not a book that I would have gone out of my way to read. (That was my nice way of saying I find him intolerable-ish.) I won it in a giveaway, it sat on my bookshelf for a while, and I finally decided to give it a chance.

Although I’m an omnivore, I have read some vegan books in my day (The Face on Your Plate and The Ethics of What We Eat: Why Our Food Choices Matter), so most of what Foer had to say about factory farm conditions and the moral implications of eating meat weren’t new to me. I think the strength of his book—and something I could relate to acutely as someone with dietary restrictions—was his discussion of the real social impact of having a limited diet. Frankly—for me, at least—it’s a hard thing to articulate without feeling like a whiny brat.

Food is inherently social and deeply rooted in tradition, especially this time of year. No revelation there. The harder part is that opting out of the mainstream diet—for whatever reason—can feel like a denial of tradition. I have particularly vivid memories my mother’s three-hole cake, a frugal (vegan, it turns out!) chocolate cake recipe that came from an index card written in my grandmother’s handwriting. It was no nonsense and elegant in its simplicity: a good cake. Making and eating it with my mother said something about our shared heritage (poor, white, scrappy). But, now that I don’t have that cake, what do I have? I know it sounds melodramatic, but really.

I think, as Foer seems to, that having a variety of eaters at your table (even the dreaded vegans and gluten-avoiders) is an opportunity for tradition to evolve, to widen. With that I offer you a new, more shareable tradition: a free-form tart with balsamic braised onions and a sage-y (ha!) cashew cream. I am hoping—really hoping—that you don’t make this and wish it had goat cheese and sausage all over it. By all means, serve it next to the goat cheese and sausage if you need to and, for the love of god, talk to people about what they ate and what they eat now. It’s as important as what’s on the table.

Vegan Balsamic Onion and Sage Cashew Cream Tart

for the Sage Cashew Cream
You’ll only use about half of this for the tart. Leftovers are great on roasted beets, whipped into mashed potatoes like you’d use heavy cream, or as a topping for the finished tart.

1 cup raw unsalted cashews (measure pre-soaking), soaked 8 hrs, drained, and rinsed
4 fresh sage leaves
1/4 t sea salt
1/2 t lemon juice
1/2 cup water

1. Puree all ingredients in a blender until smooth. Refrigerate until ready to use.

for the tart dough
This tart dough recipe is from my Rosemary Pear Galette.

1/4 cup tapioca starch
1/4 cup oat flour (make sure it’s from certified gluten-free oats)
1/2 cup millet flour
1/2 t xanthan gum
pinch salt

1/3 cup cold Spectrum Organic Shortening
2 T ice water

1. Stir together oat flour, millet flour, tapioca starch, xanthan gum, and salt.
2. Prepare a cup of ice water.
3. Cut the shortening into chunks then incorporate it into the flour. If you don’t have a pastry cutter (I don’t!) just use a fork. You’re done when the shortening is evenly blended and you have mostly small pea size chunks of flour/fat.
4. Using a tablespoon, gradually add cold water, just until the dough comes together. For me, 2 T was exactly enough.
5. Refrigerate the dough for 20-30 minutes while you prepare the onions.

for the Balsamic Onions

4 cups white onions, sliced to uniform thickness
2 T balsamic vinegar
a few turns of freshly ground black pepper
salt to taste
2-3 generous glugs of olive oil

1. Over medium heat, saute the onions in the olive oil until they begin to brown and brown bits begin to form on the bottom of the pan.
2. Reduce heat to low and add the balsamic vinegar to the pan, using it to scrape up any brown bits from the bottom.
3. Crank in the pepper and cook on low until the vinegar is fully absorbed.
4. Let cool while preparing the crust.

Assembling the tart

1. Preheat the oven to 350 degrees.
2. Roll out the dough to somewhere between 1/4 and 1/8 inch thickness using your preferred method. I rolled it out between two sheets of floured wax paper.
3. Sprinkle gluten-free cornmeal (if you have it) on a baking sheet and transfer the rolled out dough to the sheet.
4. Use a spatula to spread a about half of the cashew cream onto the dough, keeping it 1 1/2-2 inches from the edge.
5. Place the balsamic onions on top of the cashew cream. I used all of mine, but use your judgment and err on the side of under-filling.
6. Gather the edges up around the filling however works best. You could pinch it together or fold small sections over.
7. Bake at 350 degrees until golden, about 30 minutes. Store it in the fridge if you’re not going to eat it within a day or so.

{ 0 comments }

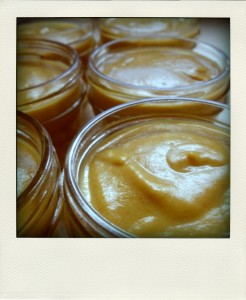
Butternut Squash Custard

by autumn on November 21, 2010

I am dangerous in Williams Sonoma. I pet the Le Creuset and have to pry myself away from the Vitamixes. Mostly, I just leave abruptly, acutely aware of the Vitamix shaped hole in my life. DRAMATIC SIGH.

Really though, I’d like a Vitamix, but the truth is I can’t currently justify spending $500 on a blender… even a life changing one. Sometimes this hurts more than others. It hurts more when I spy these adorable little pumpkin custards from Elana’s Pantry. They’re vegan, so their creaminess comes from blending cashews at a super high speed IN A VITAMIX.

Although Elana wrote this recipe specifically for the blender of all blenders, I was determined to adapt it for my low-budget wonder. I soaked the cashews, reduced the amount of water, and switched up the method a tad, but she still deserves all the credit. Her and my $20 blender.

Butternut Squash Custard
I really love cashews as a replacement for cream and barely think of them as a substitution; They hold their own! Agar flakes are a vegan form of gelatin and aren’t as hard to find as you might guess. My neighborhood health food store had them. Adapted from Elana’s Pantry.

1/2 cup raw cashews
1T agar flakes
1 pinch salt
1 1/4 cups roasted butternut squash
1/4 cup agave
1T vanilla
1t ground cinnamon
1/4t ground ginger
1/4t allspice

1 cup boiling water

1. Cover the cashews in water and soak them for at least 8 hours or overnight.
2. Drain and rinse the cashews and place them in a blender with all of the ingredients except the boiling water.
3. Add the boiling water to the blender and CAREFULLY blend until smooth. Pour into 4 oz jelly jars, mugs, or small bowls and refrigerate to set.

{ 0 comments }

Gluten-free Pumpkin Dark Chocolate Chunk Scones

by autumn on November 20, 2010

Fall (aka: pumpkin treats season) and I got off to a rocky start. First it was the pumpkin ice cream that curdled from the addition of fresh ginger. Then there was the pumpkin ice cream that froze into a solid block of pumpkin flavored ice. THEN there was the misguided vegan pumpkin bread that had the texture of a vegan pumpkin bread sandcastle. You get the idea. All I wanted was what I had been waiting all year for: a damn pumpkin flavored treat that didn’t suck. Well, here they are.

People who know anything about pastry, I can see you rolling your eyes. And I get it; these aren’t really scones. No cutting butter and no adding cream. They are, however, leavened with baking soda and are just barely sweet so the pumpkin and spice shine through. On that note, these are way easier to make than traditional scones and I’ve made up for the lack of milkfat by mixing in half of a candy bar. Because I like you.

Gluten-free Pumpkin Scones with Dark Chocolate Chips
I made these high quality dark chocolate chips by chopping up a chocolate bar, but you can use regular chocolate chips as well. These are easily made dairy free (mine were!) by using a non-diary milk and a vegan dark chocolate.

1/2 cup sorghum flour
1/2 cup millet flour
1/2 cup tapioca flour
1/4 cup oat flour
1 1/2 t baking soda
1 1/2 t xanthan gum
1/4 t salt
3 T brown sugar (lightly packed)
1 t cinnamon
1/2 t ginger
1/2 t allspice
1/4 t cardamom

1 egg
2/3 cup canned pumpkin
1/4 cup canola oil

2 T milk

1/3 cup chopped dark chocolate or chocolate chips

1. Preheat the oven to 400 degrees. Whisk together the dry ingredients in a large bowl and set aside.
2. In a medium bowl beat the pumpkin, oil, and egg until well combined.
3. Pour the pumpkin mixture into the dry ingredients and stir until mostly combined. At this point, the dough will be very dry and a bit crumbly.
4. Add up to 2 T of milk to bring the dough together. It will be a bit sticky, but should still be firm enough to collect into a ball and hold its shape. Fold in the chocolate.
5. Place the dough in the center of a parchment lined baking sheet and–with wet hands–flatten into a disk about 6 inches across.
6. With a wet knife, slice into 8 triangles and spread them out evenly on the baking sheet.
7. Bake for about 15 minutes or until a tester comes out clean.

{ 0 comments }

Cranberry Ketchup

by autumn on November 14, 2010

Cranberries are pretty darn adorable. Let me fill you in. They make a cute little popping sound when you cook them, kind of like a lobster scream but less traumatic. They grow in bogs (!). If you’re lucky enough to buy them from a greenmarket, they’ll probably be in a big box or barrel that you can stick your hand in like Amelie and wiggle around your fingers. And they’re sort of like snowflakes; the heirloom cranberries that I got last weekend at the New Amsterdam Market were all blushed red a little differently.

Why did I take such a nice little thing and make it into something weird like cranberry ketchup, you ask? As my official taster so succinctly put it, It tastes like ketchup. All the ketchup-y elements are there: the onions, the spice, the sugar and vinegar. The cranberries give it a little tang (Ball suggests using it like steak sauce) and I couldn’t help but think that this would make a perfect edible holiday gift.

Cranberry Ketchup
Adapted from the The Ball Complete Book of Home Canning and Preserving. Here’s the original recipe. Make your own adjustments from it to ensure safety. Below is what I did. Consider yourself warned: with the full amount of cayenne, this is quite a bit spicier than your friendly neighborhood ketchup.

4 cups (about 1 lb) fresh cranberries
1/2 cup white onions, chopped
1 1/2 cloves of garlic
1/2 cup water
1 cup lightly packed brown sugar
1/3 cup + 1 t vinegar
1/4 t dry ground ginger
1/2 t salt
1/4 t allspice
1/8-1/4 t cayenne pepper

1. Combine the cranberries, water, onion, and garlic in a stainless pot over high heat.

2. When the mixture is boiling and the cranberries begin to pop, reduce heat to low and simmer for 8-10 minutes.

3. Remove from heat and carefully puree the mixture until smooth.

4. Return to med-high heat and add the remaining ingredients. When mixture boils, reduce the heat and simmer until it reaches the consistency of commercial ketchup (20-30 minutes).

5. Prepare jars and lids and process in a water-bath canner according to the directions here.

Makes four 4 oz jelly jars plus a little extra for the fridge.

{ 3 comments }

Spicy Apple Chutney

by autumn on November 1, 2010

I need a lot of alone time. A LOT. A key ingredient to sanity in the most populous city in the country (it stresses me out just typing it) is time away from people. But, here’s the thing about living in the most populous city in the country, the rent is too damn high. So even when you’re home, away from all those people, there’s people around. Anti-social rant over.

Last night, I had the rare occasion of having the apartment to myself. I took the opportunity to use my giant new canning pot that takes up half the stove and stink up the place by making some apple chutney.

I made plenty of sweet treats with my apple-picking haul, so I was looking for something a different, something not in the pie genre. I like the idea of making chutney from apples. It’s economical and a late-season chutney option when peaches aren’t around. I halved a pretty straight forward recipe from the National Center for Home Food Preservation and made it spicy by leaving in the pepper seeds.

Spicy Apple Chutney
If you prefer less heat, seed the pepper. Makes between 2-3 pints. Adapted from here.

1 quart chopped, cored, pared tart apples (about 5 medium)
1/2 cup chopped onion
1/2 cup chopped sweet red bell pepper
1 hot red pepper, chopped
3/4 pounds seedless raisins
2 cups brown sugar
1 1/2 tablespoons mustard seed
1 tablespoon ground ginger
1 tablespoon ground allspice
1 teaspoon canning salt
1/2 clove garlic, crushed
1/2 quart white vinegar (5%)

1. Combine all ingredients in a large non-reactive pot over med-high heat. Bring to a boil then reduce heat.

2. Simmer until thick. (The original recipe said it would take about an hour and fifteen minutes, but I might suggest between forty-five minutes and an hour. I ended up with a lot less than the expected quantity, so I am guessing mine cooked down a little too much.)

3. Process in a boiling water canner, according to the instructions here.

{ 1 comment }

No-Bake Oatmeal Cookies, Gluten-free

by autumn on October 29, 2010


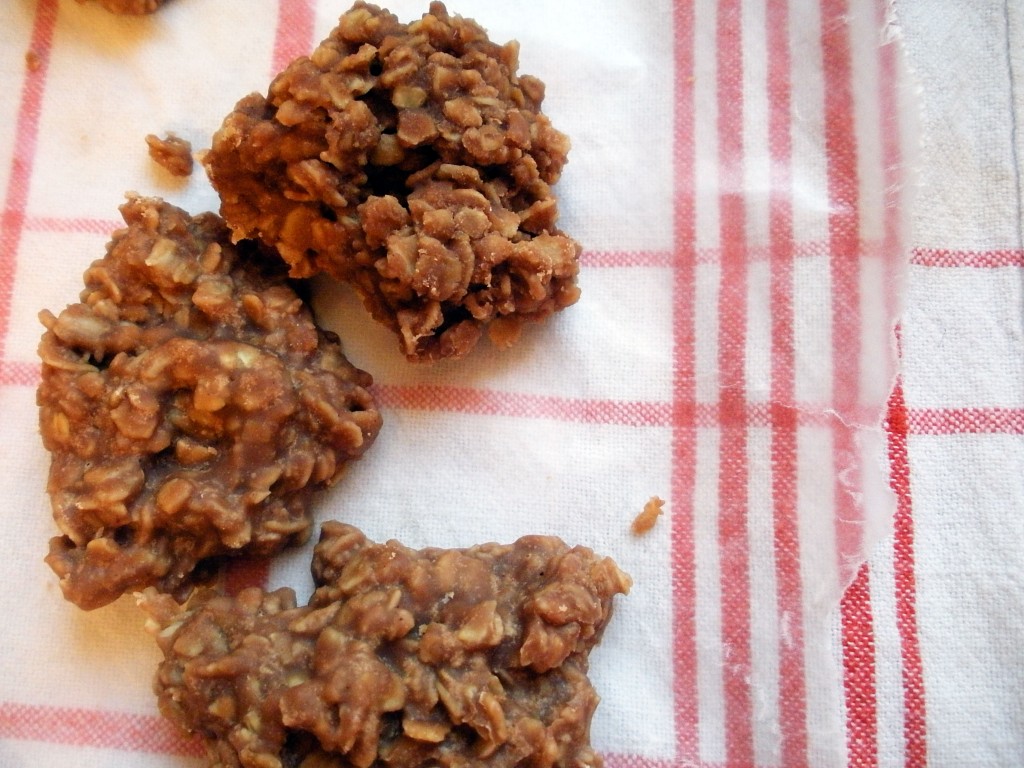
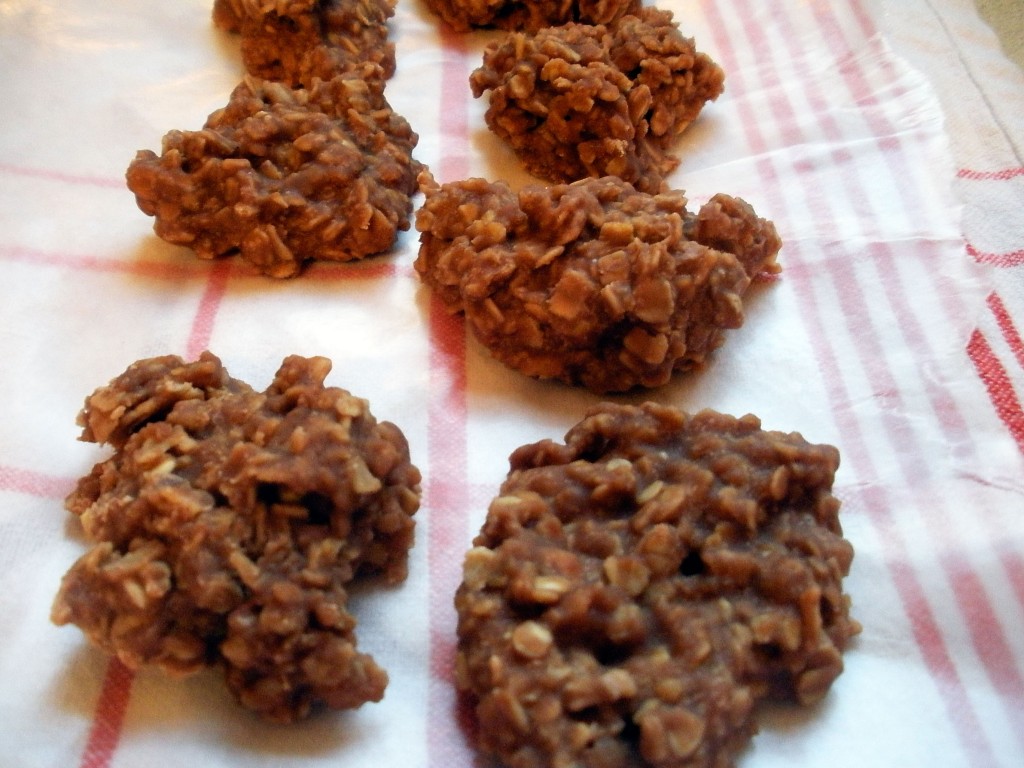
These are bake sale cookies; Cookies that you forgot you love. Maybe you think it’s a little lame to be posting a recipe that is a million places on the internet. Consider this less of a recipe and more of a PSA.

First thing’s first: Remember these cookies? They’re ubiquitous, but I am guessing maybe you forgot about them. Maybe pushed them aside for more impressive butter and sugar based treats. 36 hour chocolate chip cookies? Yeah, I’m itching to try those too, but there is also something to be said for the simple and enduring.

These no-bake oatmeal cookies had been on my mind, but without a good gluten-free alternative for quick oats I had pushed them aside. Then, a revelation in Price Chopper.

You see, I was in upstate New York recently and indulged my passion for giant, well-lit supermarkets by visiting Price Chopper for the first time. It didn’t disappoint. Among other wonders, I found Bob’s Red Mill Gluten-free Quick Cooking Oats. I immediately thought of these cookies. (More info on Celiac Disease and Oats here.)

I used the Brown Eyed Baker’s version of this recipe because it was most like how I remembered my mother’s. Of course I subbed gluten-free quick cooking oats for the standard quick oats. But, like I mentioned, there are plenty of versions of this recipe. Find one that makes you think of someone who once made you cookies.

{ 0 comments }

Apples Everywhere

by autumn on October 23, 2010

Last weekend, I went upstate, visited a dear friend, and went apple-picking. It was lovely and if you don’t believe me there are pictures. I’ve lived in New York on and off for over five years and this was my first time apple picking. I made up for all those missed years by bringing home WAY MORE apples than was prudent to carry on megabus. So, I’ve been cooking with apples. Just a little.

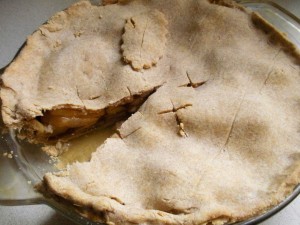
See that apple pie up there? There are 3 things about that apple pie this will blow your mind. 1) I made it. 2) It’s gluten-free. 3) There’s bourbon in it. I used Shauna’s gluten-free pie crust recipe. Why re-invent the wheel? I filled it with about 2 pounds of apples, sliced super thin, a half cup or so of sugar, a splash of bourbon, 2 tablespoons arrowroot, some cinnamon, and 1 teaspoon of vanilla bean paste. Do I need to tell you that this one’s a keeper?

This apple lemon-thyme bread was great right out of the oven, but turned a little soggy after a few days on the counter. I think next time I’ll try it with grated apples or applesauce because I suspect the additional moisture from the chunks of apple contributed to the texture issues. How do you make apple bread?I also reprised the crust from my gluten-free pear galette and made an apple galette. Galettes are like training wheels for pie. Really delicious training wheels. They come together so quickly and are so versatile that I have to stop myself from making them with every piece of fruit in my kitchen. God forbid I just eat some fruit without adding butter and sugar to it first.

Eating things without butter and sugar–in spite of all evidence to the contrary–is something I do. I got some really gorgeous, bright yellow turmeric and made some brown rice with turmeric, garlic, and sauteed apples and onions. And then I ate some apple galette.

{ 1 comment }

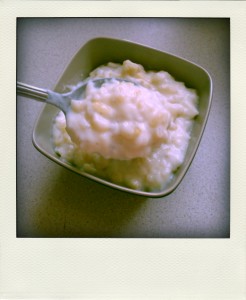
Rosemary and Vanilla Bean Rice Pudding

by autumn on October 10, 2010

Rice pudding was the first thing I learned to cook. Probably not the first thing I ever cooked, but the first thing I really knew as a cook.

For an entire winter, my grandma stayed with us and we made rice pudding. A lot of rice pudding. She and I started out cooking from her handwritten recipe. It’s a point of pride that I learned to temper eggs before I mastered long division.

I think my grandma pretended to have lost the recipe–just the sort of wiley thing that she would do. We made it without; I knew the ritual of rice pudding without realizing it. This early moment shaped who I am in the kitchen. I would rather know rice pudding, than follow a recipe for it.

That said, each time I make rice pudding it’s different. It’s my go-to way of using up cooked rice and whatever type of milk happens to hanging out in my fridge. Since making rosemary simple syrup this summer, I’ve been really into using rosemary in sweet applications. Hence, this galette.  I also just tracked down some Nielsen-Massey Vanilla bean paste that I am absolutely enamored with. If you are a baking nerd like this girl, you’ll be in love.

Trust me on this flavor combination. It’s strange and comforting, a pairing that I strive for in food and life.

Rosemary and Vanilla Bean Rice Pudding
Because this pudding is thickened with cornstarch instead of eggs, it can easily be made vegan by using a non-dairy milk. I used cooked brown jasmine rice, which worked really well, but any leftover cooked rice will do. Finally, to infuse the rosemary, I used a tea filter. You could also use cheesecloth or a coffee filter.

2 1/2 cups whole milk, plus a bit more to mix with the cornstarch
1 1/3 cups cooked brown jasmine rice
1/2 cup sugar
4 sprigs of rosemary, placed in a tea filter for infusing
3 T cornstarch mixed with enough cold milk to make it pourable
1 t vanilla bean paste or vanilla extract (make sure it’s gluten-free)

1. Combine the rice, sugar, rosemary, and 2 1/2 cups milk in a saucepan over med-low heat. Stir frequently to prevent burning.
2. When it begins to boil (not a full rolling boil here, a gentle boil) remove from heat and let steep for about 15 minutes.
3. Remove the rosemary packet and bring the mixture to a gentle boil again, over med-low heat.
4. Stirring constantly, add the cornstarch milk mixture to thicken.
5. Remove from heat and stir in the vanilla

More Rice Pudding:

Brown Rice Pudding from Joy the Baker
Arroz con Leche from Smitten Kitchen
Sweet Rice Pudding from Gluten-free Girl

{ 2 comments }