by autumn on October 17, 2011

With the busiest part of preserving season coming to a close, I’ve been thinking back on the stuff I put in jars this year. In retrospect, I think there were certain gems that I was so anxious to get in jars (hello, strawberries!) that I didn’t shove enough in may face when they were at their best. It’s a seasonal eater’s balancing act.

I’ve been taking the opposite approach with grapes: resisting the urge to preserve them and eating them fresh for weeks. We’ve been eating them out of hand, having graple sodas, and watching our tongues turn blue from a simple yet stunning concord grape sorbet. Most recently, I made a super small batch of homemade concord grape jam for this PB&J pie. The jam is a little bit of work, but—oh my—this pie is worth it.
Other than the jam, this pie is dead simple. It’s a cookie crust filled with peanut butter, cream cheese, and heavy cream (yup, just go with it!), and topped with the jam. That’s it! It may be the most ubiquitous kid sandwich ever in pie form, but the concord grapes definitely up the sophistication. Of course, in a pinch, you could use any homemade or store-bought jam or jelly, but something a little on the runny side will be easiest to spread on top of the pie.

PB&J Pie
Ingredients
- 4 oz gluten-free cookies (I like mi-del gluten-free gingersnaps for cookie crusts)
- 3 oz pecans
- 1 oz gluten-free oat flour
- 6 T butter, melted
- 1 cup creamy peanut butter, at room temperature
- 8 oz cream cheese, at room temperature
- 1 cup powdered sugar
- 2 t vanilla extract
- 1 cup heavy cream
- 1 pinch salt
- 1 lb concord grapes
- 1/3 cup granulated sugar
- 1 splash lemon juice
Cooking Directions
- Preheat oven to 350 degrees. To make the crust, pulse the cookies and pecans in a food processor (if you've got one) until they're finely ground.
- Place in a large bowl with the oat flour and salt. Pour the melted butter into this mixture and stir until combined.
- Press into a 9 inch pie plate and bake for 10 minutes at 350. Allow to cool completely before filling.
- To make the filling, beat the peanut butter and cream cheese with an electric mixer until well combined.
- Add the powdered sugar and beat until fully incorporated.
- Add the vanilla. Then add the heavy cream gradually, beating well after each addition.
- Continue beating until the mixture is fluffy.
- Pour the filling into the cooled crust and refrigerate the pie while you make the grape jam.
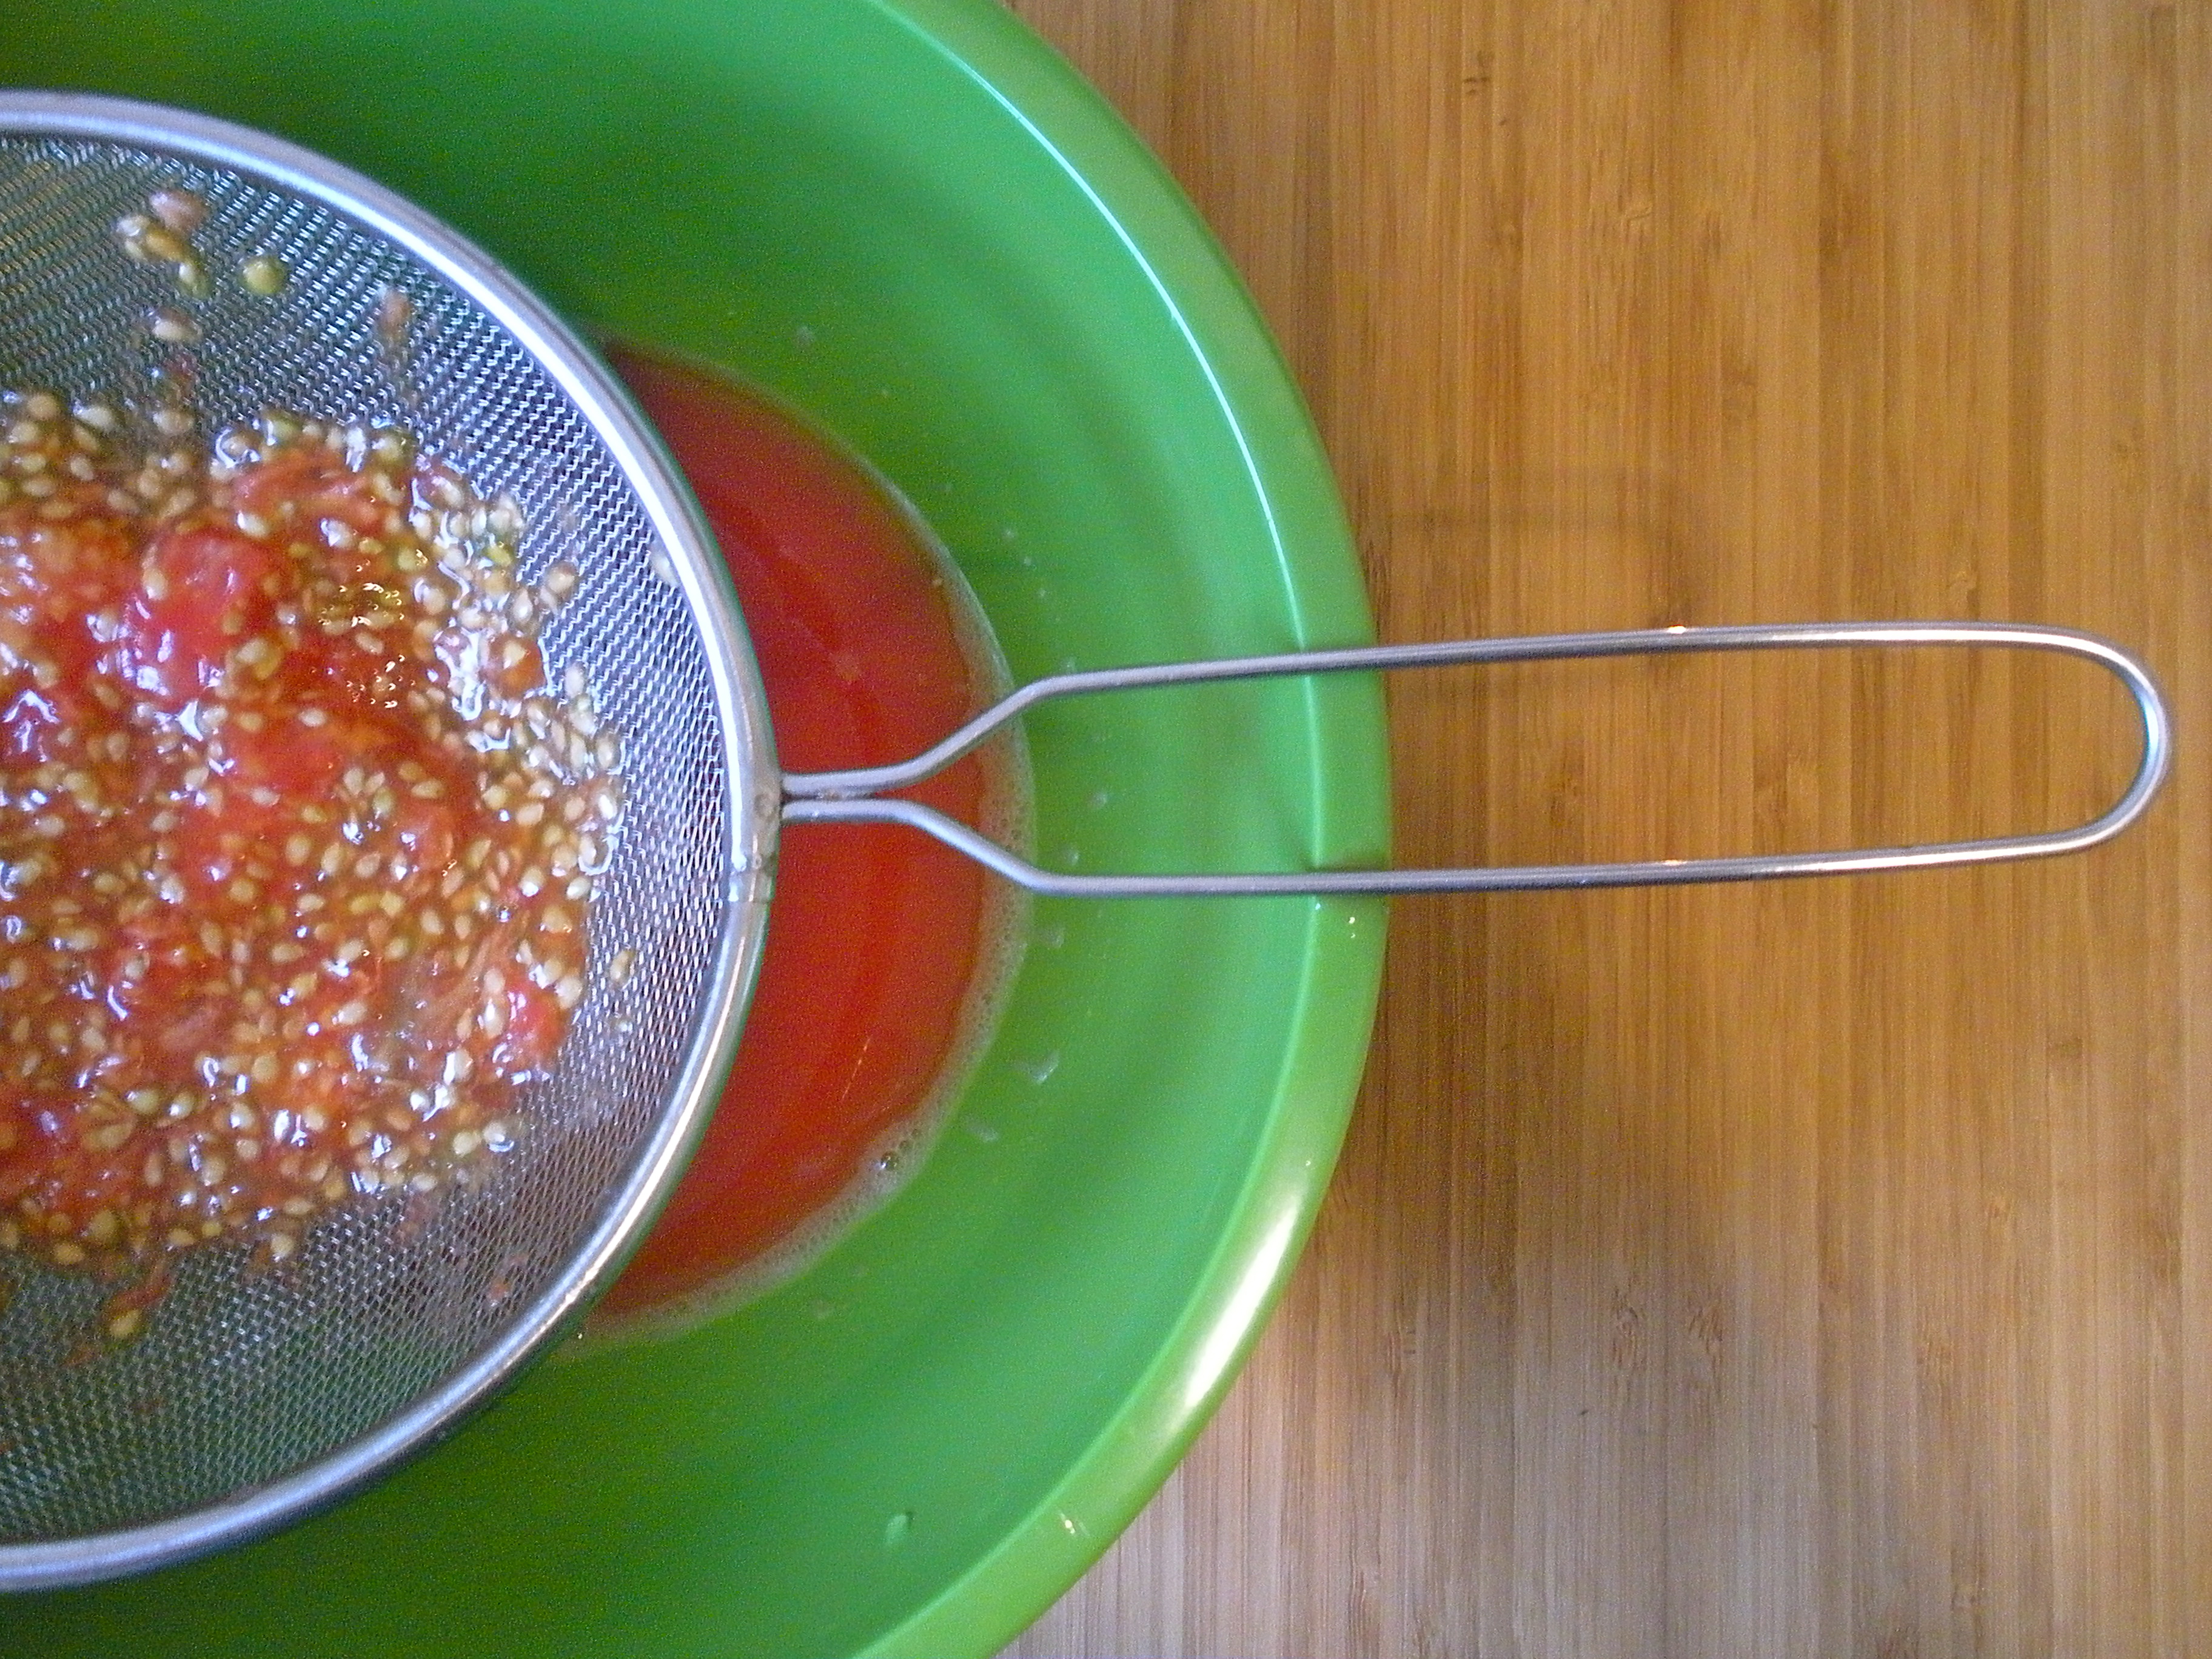
- To make the jam, slip the skins off the grapes and separate them from their insides (this is not as annoying as it sounds.) Reserve skins.
- Bring the insides to a boil then reduce heat and simmer until the seeds separate from the flesh.
- While you're waiting for the insides to cook, finely chop the skins (a food processor works well here too).
- Once the insides are done cooking, press them through a fine mesh sieve to remove the seeds. Combine the resulting liquid with the chopped grape skins, sugar, and lemon juice and bring to a boil.
- Reduce heat and simmer until thickened. Test for doneness using the plate test*, but keep in mind a slightly loose set is what you're going for. You want it to thicken, but still be pourable.
- Allow the jam to cool to room temperature. Once it's cool pour it over the top of the pie and refrigerate.
*more info on the plate test here.
Notes:
- I cobbled together this crust because I didn’t have enough cookies to make an all-cookie crust, but I was really, really happy with how it turned out. Feel free to use your favorite recipe for a cookie or graham cracker crust, gluten-free or not.
by autumn on October 5, 2011

I have a little confession to make. I’m an avid farmer’s market shopper—that’s not the confession. By “avid” I mean “deranged enough to leave my apartment at 7:30 am on a Saturday and ride the train for 30 minutes each way so I can get there before all the other kooky New Yorkers.” That said, I’m a little bashful to share that I had never tried local, non-supermarket grapes until this month.
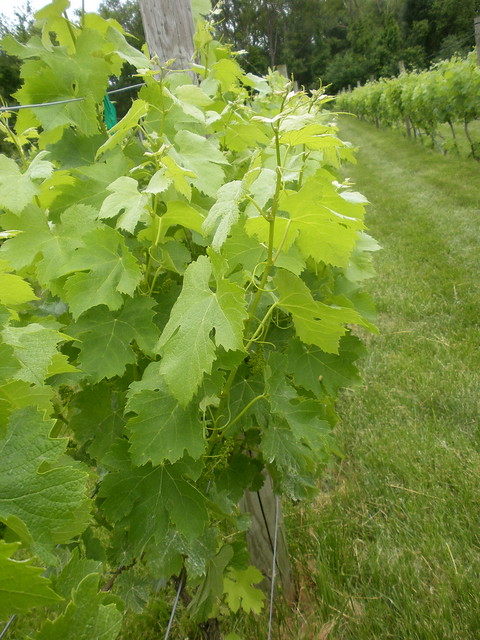
some city grapes on the vine at the Queens County Farm
After chatting with Kate about concord grapes on the podcast, I couldn’t not get some. And now that I’ve tried them, I am prepared to tell you that the stuff we’ve been paying way too much for at the grocery store is not grapes. Not grapes at all. You know the part in Willy Wonka and the Chocolate Factory when Violet Beauregard tastes a three course meal full of flavors in one piece of gum? You’ll taste that much in a grape like this.

This grape syrup is spiked with maple. Grape + Maple = Graple. I love it in a cocktail (gin or vodka, graple syrup, and seltzer) or just mixed with seltzer or homemade grape soda. I need to make pancakes so I can drown them in this ASAP and obviously it’d be great on ice cream. Freeze it in ice cube trays for mid-winter graple joy.
Graple Syrup
Yield: about one pint
Ingredients
- 1 lb concord grapes (don't have to be seedless, but mine were)
- 3/4 cup granulated sugar
- 1/4 cup maple syrup
- 1 cup water
Cooking Directions
- Combine all ingredients over high heat and bring to a boil that cannot be stirred down.
- Reduce heat to a simmer and cook for 5 more minutes.
- Let it cool slightly and run it through a food mill.
- Strain the resulting liquid through a fine mesh sieve.
- Store in the fridge.
Notes:
- This is adapted from Put ‘Em Up by Sheri Brooks Vinton.
- If you don’t have a food mill, try just pressing this through a fine mesh sieve.
More awesome homemade syrups:
by autumn on September 27, 2011

I’ve started a podcast. It’s about food and words. I’ve been so excited to say (type?) that, that I just had to get it out. Of course, that’s not the whole story.
I was at the wedding of a dear friend this past weekend and amidst assigned-seat small talk, someone asked “What’s important to you?” Not, “Where do you work?” Not, “Where in the City do you live?” But, “What do you care about?” My answer: poetry and food.
There are a lot of us out there that care about language (poetry, blogging, fiction, visual storytelling, non-fiction, all of it!) and also food. I know I’m not the only one and I know it’s not a coincidence. After all, I wrote a love poem about cleaning the poop veins from shrimp. I need to talk about this.
I made Alphabet Soup for completely selfish reasons: to talk to inspiring people about food and words. However, I’m delighted to share these conversations with you.
Click on over to Alphabet Soup and check out Episode 1, which features Kate Payne, author of The Hip Girl’s Guide to Homemaking. Kate was kind enough to chat with me about the process of writing and selling The Hip Girl’s Guide to Homemaking, her poetry and fiction, and what she’s working on next. Also, the important stuff: concord grapes, angsty high school poetry, and CzesÅ‚aw MiÅ‚osz. Listen here.
by autumn on September 14, 2011

You’ve been canning tomatoes, haven’t you? Peeling and crushing and milling and seeding? Me too. We do it because they’re precious. Too precious to waste.
After seeding 3 lbs of tomatoes for salsa (with a paper cut on my pinky–ouch!) I couldn’t bring myself to throw any bit of those tomatoes away, even the gloppy, slimy seeds. If Julia could make liqueur out of cherry pits, I could make something out of tomato guts. It didn’t take me long to push the goop through a fine-mesh sieve.

The resulting “tomato water” was certainly more watery than commercial tomato juice, but was pleasantly sweet and super refreshing.
From the seeds of three pounds of tomatoes, I only ended up with a scant cup of liquid. Clearly a cocktail was in order. We’ve been loving Hendrick’s Gin over here. It’s a bit more expensive than our usual, but exponentially better.

Into the shaker went 1 part tomato water, 1 part Hendrick’s, and a splash of citrus. We served it in a salt rimmed glass. There’s no clever name for the cocktail, but according to Facebook, the catchy name for the vegetable version of nose-to-tail is “root to shoot.” I’ll take it!
by autumn on September 3, 2011

I have quite a collection of of strange old recipe leaflets and booklets, chief among them are the Joys of Jell-O, Jello-O Pudding Ideabook, and the Gell-Cookery Recipe Book. In case you missed it, there seems to be a period in American culinary history characterized by putting gelatin in any darn thing you could.
Every once in a while, I flip through my Jell-O library (right past the “jellied cream of chicken”, thank you very much) determined to resurrect a pleasantly wiggly dessert. The problem is, as much as I’m fascinated by them, I’m equally as repulsed.
Once again, I’ll sing the praises of plums. I figure if anything can bring class to a potentially hot, kitschy mess it’s the elegant damson plum. Thanks to these beauties, some creamy greek yogurt, and a pinch of grated fresh ginger this icebox pie is more pink panna cotta than “shrimp chili mold” (yeah, that’s a thing).

I made a homemade, gluten-free (of course) pie crust for this, which made the recipe a tad more time-consuming than your average fridge dessert. It was totally worth it, but feel free to take a short-cut on the crust and use pre-made if you’re not gluten-free or try your favorite cookie/crumb crust. I bet a gingersnap crust would be extra special here.
Plum Yogurt Icebox Pie
Ingredients
- 1 lb plums, I used Damson
- 3/4 cup granulated sugar
- Zest of 1 lemon
- 1 t freshly grated ginger
- 1 packet knox plain gelatin
- 3 T cold water
- 1 7 oz container full-fat greek yogurt
- 1 of your favorite pre-baked pie crust
Cooking Directions
- Halve the plums to remove the stone. Chop each small half in quarters and place in a medium bowl with the sugar, lemon zest, and grated ginger.
- Stir and allow the mixture to set at room temperature while you make your pie crust. If you're using a pre-made crust, just allow this mixture to sit at room temperature for at least an hour before you proceed.
- After the plums have set for at least an hour, pour the cold water in a large bowl and sprinkle the gelatin in an even layer over the top. Do not stir. Allow this to set while you cook the plums.
- Place the plum sugar mixture in a small saucepan and cook over med-high heat until the fruit is broken down. How long it takes will depend on the size of your plums, but it'll likely only take a few minutes.
- Once the fruit it broken down, immediately pour the hot plum sauce over the gelatin/water mixture.
- Stir for a minute or two, scraping the bottom of the bowl with a spatula to insure all the gelatin is incorporated.
- Stir in the yogurt until it is completely incorporated.
- Pour into the cooled pie crust and let cool to room temperature. Then refrigerate until set.
Note: I’ve been playing with my gluten-free pie crust recipe lately. For this one I used the following flour mixture: 3 oz superfine brown rice flour, 1 oz tapioca flour, 1 oz potato flour, 1 oz oat flour, 3/4 t xanthan gum, and a pinch of salt. I cut 1 stick (4 oz) of butter into the dry ingredients and added enough ice water for it to come together. Here’s my post on gluten-free pie crust for more tips and instructions and my original gluten-free pie crust recipe.
by autumn on August 26, 2011

What are your food splurges? A pint of perfect figs, a medallion of goat cheese wrapped in a smoked maple leaf, or beans that look hand-painted? I’m talking about the things you don’t buy because they’re economical, but because you’ve been economical and—well—you deserve something nice.
I count fresh shelling beans among my special treats. Shelling beans are just like the dried or canned beans you’re used to (say, cannellini), but they’re fresh and still in their pods. As the name implies, they’re meant to be shelled before cooking. They start showing up at markets in the northeast right about now and run about $5-6/lb. They’re far from being a great value, but as splurges go, they’re one of the best. It’s hard to even compare shelling beans to their dried and canned counterparts—their flavor and texture is amazing.

Last Friday, I walked up to the greenmarket after work and got a great deal on fresh cranberry beans. As much as I love them, I still bought way more than I could eat in a week. Should you ever find yourself in a similar predicament, I’d suggest you do the same.
Shelling beans freeze beautifully. To freeze mine, I shelled and blanched them in boiling water for 3 minutes. (Start timing as soon as you drop the beans in the water. Don’t wait for the water to come back up to a boil before you start timing.) Then I drained them into a colander and covered them with ice to stop them from cooking. Feel free to use a proper ice bath here, but (full disclosure) I own exactly one ice cube tray so I improvise.
Once they cooled to room temperature, I arranged them in a single layer on a baking sheet and allowed them to dry. Excess water on the beans when they go into the freezer will leave you with one big frozen slab of bean. Next I placed the baking sheet in the freezer until the beans were frozen solid. After they were frozen, I portioned them out into freezer-specific ziploc bags and returned them to the freezer. I’d say that I put about a cup of beans into each bag, but do what makes sense for you!
I’m happy to have some of this little luxury squirreled away for the winter, but until then here are some great ways to fresh enjoy shelling beans now.
by autumn on August 18, 2011

Sometimes when I look in my fridge, I feel like all I see are condiments. And I get a little panicked. Granted, they’re darn fine condiments. Most recently there’s been peach sage jam, some of my hot cherry preserves, and this tomatillo salsa verde. As much as I enjoy having lovely things in jars in my fridge, I have this silly little notion in my head that jam doesn’t (or shouldn’t) make a meal.

Except last Sunday, a wayward jar of jam really did make our meal. Call me old fashioned, but I like to cook a proper Sunday dinner. Usually something nicer and more labor intensive than what we’d eat any other day of the week. Last week, Sunday rolled around and it didn’t seem like I had anything particularly worthy of a Sunday dinner. I unearthed some protein from the freezer, added garlic, some balsamic vinegar, a couple dried chiles, a splash of water, and—feeling like I had nothing to lose—a half jar of those sour cherry preserves.

It turned out much better than I expected—definitely Sunday dinner worthy—and my leftover jam was what really elevated the dish. This tomatillo salsa verde has that same magical, leftover-transforming power. I poured some on last night’s brown rice, sprinkled it with goat cheese, and it was something much less pathetic than cold (I can’t bear to buy a microwave) leftovers.

I feel a little silly even sharing this “recipe” with you because it’s barely a recipe. That is to say, it’s pretty flexible. You could certainly add onions or cilantro. I’m not a huge fan of raw onions and the boyfriend is a cilantro hater. Luckily, it couldn’t be simpler to make and benefits from at least a day in the fridge to let the flavors get cozy.
Tomatillo Salsa Verde
Yield: Makes 1 pint
Ingredients
- 1 lb green tomatillos
- 1 small jalapeno
- 1 small poblano pepper (mine was super small)
- 1 T lime juice
- 1 clove garlic
- salt to taste
Cooking Directions
- Remove the tomatillo husks. Wash the tomatillos and set them aside to dry while you blister the peppers.
- Heat the whole peppers in a very hot, dry cast iron skillet until they have large charred spots, but are not completely blackened. Stirring them infrequently will help the charred spots develop.
- Remove the peppers from the pan and place them in something airtight (a ziploc bag or jar will work).
- Place the tomatillos in the same very hot, dry skillet and char them in the same way you did the peppers. They are done when their juices start to run or they have a couple sizable charred spots. They won't get as blackened as the peppers.
- Cut around the stem of the poblano and pull on the stem to remove most of the seeds. Cut the stem from the jalapeno.
- Combine all of the ingredients except the salt in a food processor and chop until it reaches your desired consistency. I left it chunkier, but that meant there was a little extra juice that wasn't fully incorporated.
- Add salt to taste.
More Tomatillo Salsa Verde:
by autumn on July 31, 2011

Plums are the overlooked beauties of the fruit world. The only metaphor I can think of here involves a certain teen romantic comedy and a wonky, diamond-in-the-rough girl who gets a make-over for prom. They’re not showy like our coveted sour cherries and they stick around the market longer here in the northeast, so they create less of a frenzy. I, however, think they’re darn near perfect.

I love a good marriage of beauty and utility. Beyond being gorgeous, plums are highly acidic and some varieties even contain a fair amount of pectin–both boons for folks interested in putting plums in jars. I made this plum lemon verbena jam right before my trip home. I hadn’t set out to make it, but after finding both plums and fresh lemon verbena at the market, I knew I had to set them up.
Even on vacation, I must have had plums on my mind because after some awesome thrifting…


and some awesome mountains…

I came back to the city and immediately bought more plums.
Plum Lemon Verbena Jam
Notes: This makes about a pint, so it would be fine to stash in the fridge. I like putting up even teeny, tiny batches like this one, so I processed it in a water bath canner for 10 minutes. This jam is another adaptation of Christine Ferber recipe, so there was no recommendation for processing in the original recipe.
Yield: 1 pint
Ingredients
- 600 grams (about 1 lb 2 oz) plums
- 350 grams sugar
- 2 T lemon juice
- 8 leaves lemon verbena
Cooking Directions
- Remove the stones from the plums. Roughly chop the plums. Place 5 spoons on a small saucer in the freezer.
- Place the chopped plums in a preserving pot with the sugar and lemon juice. Toss to combine and allow to sit for about 2 hours.
- Heat the mixture over low heat until the sugar is completely dissolved, stirring frequently.
- Once the sugar dissolves, increase the heat to high and boil for 5 minutes.
- After 5 minutes, turn off the heat and check the set of the jam using the spoon test. This jam cooks up quite fast, so you may not need much beyond the initial 5 minutes.
- If the jam isn't set, boil for 1-2 more minutes, remove from heat, and check the set again.
- Once you are happy with the set of the jam, stir in the chopped lemon verbena.
by autumn on July 20, 2011

Despite the poor image quality, I couldn’t resist sharing this little discovery with you. It’s going to be a little quiet around here because I’m home visiting family and attempting to relax, but–again–I just had to share this.
I was here yesterday. It was a pretty delightful moment  when I spotted this old jar-lifter and realized what it was. We don’t have a ton of traditions in my family, so seeing this made me feel all sorts of warm and fuzzy that I have a tiny little part in the tradition of preserving food.
by autumn on July 13, 2011

My cherry pitter is quaint. Right up until I made this batch of preserves, I had convinced myself that “quaint” was a desirable quality in a cherry pitter.

That’s it. In case you don’t know (and, looking at that piece of equipment, how would you?) here’s what a cherry pitter is supposed to look like. At about cherry number four, this little instrument started reminding me a bit too much of a certain medical instrument whose name I’ll spare you. I gave up.
I didn’t completely give up, I just started pitting them with my hands by gently pulling them into halves and knocking out the pit. This took less time than using my “pitter” and ended up being the perfect thing for these preserves since my sweet cherries were a little on the large side.

I adapted this recipe from Christine Ferber’s Mes Confitures and Mrs. Wheelbarrow. If you’ve ever peeked at Mes Contifures you’ll know that while it contains gorgeous recipes and really smart methods, it does not follow USDA approved processing guidelines. For this missing piece, I consulted Mrs. Wheelbarrow who had also adapted a Ferber recipe for water-bath canning.

I love that each time I can, I feel like I learn something new. Something I’m still learning to have the patience for is *cough* skimming foam *cough*. Perhaps you noticed. Still, I’m really proud of these preserves!
Bourbon Cherry Preserves
Ingredients
- 2 2/3 lbs sweet cherries
- 3 3/4 cup sugar (I used organic)
- 2 T lemon juice
- 1 oz bourbon
Cooking Directions
- Pit the cherries with your hands by halving them and removing the pit.
- Stir them with the sugar and lemon juice in your preferred preserving pot and allow it to sit at room temperature for about an hour.
- After an hour, place the pot over med heat, stirring frequently until the sugar dissolves. Once the sugar dissolves you may want to stir it less and increase the heat slightly. Bring it only to a simmer.
- Remove from heat, let cool to room temperature, and refrigerate overnight.
- The next day, place 5 spoons on a small saucer in the freezer.
- Strain the cherries from the juice and return the juice to the pot.
- Reserve the cherries in a bowl and boil only the juice for 5 minutes.
- After 5 minutes add the cherries to the juice, return to a boil, and boil for 5 minutes.
- Remove the jam from the heat and check the set of the preserves using the spoon test*. (Mine needed about 2 minutes past the initial 5) If the set is too loose, boil for another 2 minutes, remove from the heat, and repeat the test.
- When you are happy with the set, add the bourbon and let the jam cool for 5 minutes while stirring intermittently.
- I processed this in a water bath canner for 10 minutes, but as this was not the official recommendation of the original recipe (ie: this is not a tested recipe), this can be frozen or stored in the fridge if you prefer.
*spoon test info here


